Have you ever seen your dog shiver on a cold morning walk? I did, and it changed everything for me.
Living through harsh winters with my pets taught me a lot. I learned that we must prepare them for the cold. Even dogs with thick fur can get too cold too fast.
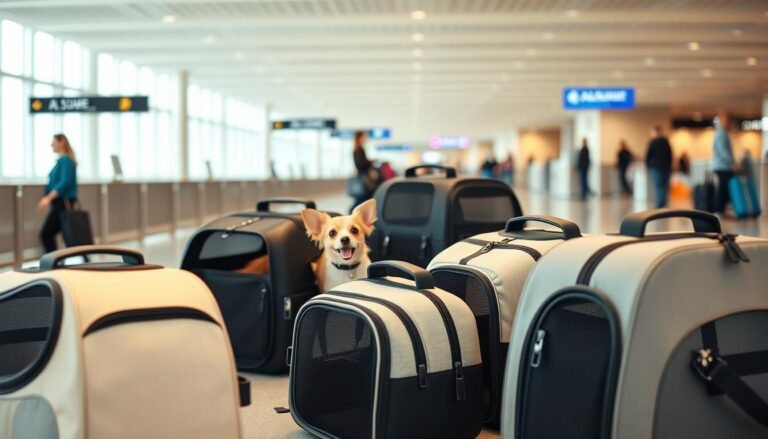
I’ve tried many pet cold-weather gear items and talked to vets about frostbite and hypothermia. This guide shares what I’ve learned about coats, boots, heated beds, and emergency kits that really help.
This guide offers practical strategies and product picks I’ve used to keep my pets safe. It’s not just about buying stuff. It’s about making informed decisions that could save your pet’s life.
Key Takeaways
- Frostbite and hypothermia are serious dangers for all pets, no matter their breed or fur thickness
- Good cold weather gear includes insulated coats, boots, and heated beds
- Cats might hide in dangerous spots like car engines when it’s cold
- Winter safety needs the right gear and knowing your pet’s cold limits
- Being ready with the right supplies can stop disorientation, injury, or worse
- Regular vet visits help figure out your pet’s cold tolerance
How I Learned About Winter Pets Safety the Hard Way
I’ll never forget that brutal February morning when my rescue dog, Bailey, started shivering uncontrollably during what I thought would be a quick bathroom break. The temperature had dropped to 18°F overnight, but I figured five minutes outside wouldn’t hurt. I was wrong.
Bailey, my short-haired mixed breed, began showing warning signs within the first two minutes. She lifted her paws repeatedly, almost dancing in place. Her pace slowed to a reluctant shuffle, and her tail tucked tightly against her body. At the time, I misread these signals as normal behavior.
By the time we got back inside, she was trembling violently and curling into a tight ball on her bed. Her movements seemed stiff, and she whined softly when I tried to move her. That’s when panic set in.
I called my veterinarian immediately. Dr. Martinez walked me through warming Bailey gradually with blankets and monitoring her condition. She explained that short-haired breeds can develop hypothermia in as little as 10-15 minutes when temperatures drop below 20°F. I had no idea.
During our follow-up appointment, Dr. Martinez taught me about breed-specific cold tolerances. My neighbor’s Husky can play in the snow for hours without issue. Bailey, with her thin coat and lean body, starts struggling at temperatures that don’t faze cold-weather breeds at all.
“Pet owners often assume all dogs handle cold the same way. Body size, coat type, age, and overall health dramatically affect cold weather tolerance. What’s comfortable for one dog can be dangerous for another.”
That experience changed my entire approach to cold weather pet care. The guilt of putting Bailey at risk through ignorance, not malice, motivated me to research everything about winter pets safety. I became obsessed with understanding the warning signs I’d missed.
Here are the critical signals I learned to recognize:
| Warning Sign | What It Means | Action Needed |
|---|---|---|
| Shivering or trembling | Body trying to generate heat | Bring indoors immediately |
| Lifting paws repeatedly | Paw pads too cold or ice burns | Use boots or limit time outside |
| Tucked tail and hunched posture | Conserving body heat | End outdoor activity now |
| Whining or anxiety about going out | Animal knows it’s too cold | Listen to your pet’s instincts |
| Stiff movements or lethargy | Early hypothermia symptoms | Seek veterinary care immediately |
The statistics I discovered were alarming. According to pet recovery services, more dogs are lost during winter months than any other season. Many pets panic in cold weather and run away, becoming disoriented in snowstorms.
Emergency veterinary clinics report a significant spike in hypothermia and frostbite cases between December and February. These aren’t just outdoor dogs either. Indoor pets taken out for walks without proper protection account for many winter pet emergencies.
My wake-up call taught me that pets can’t tell us they’re freezing. They rely on us to recognize the signs. Bailey’s experience pushed me from casual pet owner to dedicated researcher. I spent weeks learning about protective gear, understanding temperature thresholds, and consulting with veterinarians and experienced pet parents.
The emotional weight of that morning stays with me. But it transformed me into someone who could help other pet parents avoid the same mistakes. Every product I recommend and every piece of advice I share comes from that place of hard-earned knowledge.
Understanding winter pets safety isn’t about being paranoid. It’s about being prepared and observant. Your pet depends on you to make smart decisions about their cold weather exposure. I learned that lesson the hard way, so you don’t have to.
The Best Winter Coats and Jackets I’ve Tested for My Pets
My journey with winter coats started with a cheap jacket that left my dog shivering. This taught me to invest in quality pet cold weather gear. Over five years, I tested over a dozen brands in real winter conditions.
Not every pet needs the same protection. Small breeds, senior animals, and dogs with thin coats need insulated clothing. Longer coats keep them warmer, even for breeds with short legs.
Hurtta Extreme Warmer Dog Coat for Harsh Conditions
When it’s below 20°F, I choose the Hurtta Extreme Warmer without doubt. It’s my top choice for serious cold weather. It keeps my dog warm from neck to tail, even in tough winter adventures.
Last February, we got caught in a snowstorm while hiking. The wind chill was near zero. But the Hurtta kept my dog warm for two hours back to the car. The 3M reflective trim also made him visible in heavy snow.
This coat stands out for its adjustable fit. I can adjust straps for a snug fit without restricting movement. It’s waterproof and has a fleece lining for warmth. The bulk is worth it for harsh conditions.
Canada Pooch Northern Chill Parka for Everyday Wear
The Canada Pooch Northern Chill Parka is my go-to for daily walks. I found it through an affiliate partnership. It’s easy to put on and take off, perfect for an excited dog.
This parka looks stylish and keeps my dog warm and dry. The thermal lining and water-resistant shell are key. The adjustable toggle neckline keeps cold air out.
I love the adjustable belly strap. It keeps the coat in place during snow zoomies. The BonGoof Suit Premo and Little Beast X Rachel Antonoff Puffer Jacket also offer great insulation. But the Canada Pooch is my top choice for its practicality and durability.
Chilly Dog Cable Knit Sweaters for Small Breeds
My friend’s Chihuahua showed me small breeds need warmth without bulk. The Chilly Dog Cable Knit Sweaters are perfect. They keep small pets warm indoors and offer light protection outdoors.
These sweaters are machine washable, which is a must in winter. They breathe well, preventing overheating indoors. They also keep drafts out.
For indoor warmth, I’ve tried the Good Thomas Matching Knit Sweater and the Hugo and Hudson Self-Heating Dog Thermal. Both are great for pets who spend most of their time inside.
What I Look for When Choosing Pet Winter Clothing
After testing many pet cold weather items, I have a checklist. The right fit is more important than brand names. Here’s what I look for:
- Proper measurements – I measure neck, chest, and back length before ordering
- Material quality – Waterproof outer layers and breathable inner layers are key
- Easy fastening – Velcro, snaps, or zippers should be simple to use
- Reflective elements – Visibility strips or trim are important for safety
- Harness compatibility – The coat should work with my existing harness
Coverage area is critical. Belly protection is important for breeds like Dachshunds and Corgis. Neck coverage blocks wind, preventing heat loss. Never shave a dog down to skin in winter; their coat provides essential insulation.
I check petzvibes.com for reviews and recommendations. The site has helped me find many great products. I also use Chewy and Amazon to compare prices and read customer feedback.
The Canada Pooch Bestselling Snowsuit is a standout. It has a thermal lining, water-resistant shell, and adjustable toggle neckline. It’s versatile and works for many breeds and activity levels.
Understanding the difference between fashion and function has saved me money and kept my pets safe. Some designer coats look great but don’t keep pets warm. Others are too restrictive. The best coats offer good insulation, weather resistance, fit, and flexibility.
Protecting Paws from Ice, Salt, and Snow Damage
I’ll never forget the day my dog started limping after a winter walk. His paw pads were red and cracked from the salt-covered sidewalks. That experience taught me that dog paw ice protection is just as important as keeping their bodies warm.
Winter surfaces are a triple threat for our pets. Sharp ice crystals can cut sensitive paw pads. Chemical deicers burn the skin between their toes. Packed snow balls up in their fur and causes discomfort.
I now use a combination of protective gear and treatments to keep my dog’s paws safe. Finding what works for your pet’s tolerance level and your walking conditions is key. Some dogs take to boots immediately, while others need paw wax solutions.
Ruffwear Grip Trex Dog Boots: My Top Pick
After testing five different boot brands, the Ruffwear Grip Trex boots outperformed everything else I tried. These boots feature Vibram soles that provide genuine traction on icy surfaces. I watched my dog navigate a steep, ice-covered hill with confidence that shocked me.
The closure system makes all the difference. Each boot has a secure strap that wraps around the ankle and tightens with a strong closure. Unlike cheaper boots that popped off mid-walk, these stayed firmly in place through deep snow and slushy puddles.
My defining moment with these boots came during a brutal cold snap. My dog stepped directly on a sharp piece of ice that would have sliced his paw pad. The reinforced toe protection absorbed the impact completely. He didn’t even notice.
The reflective trim provides visibility during early morning walks when it’s dark. I appreciate this safety feature. The boots also clean easily with soap and water after salty walks.
Musher’s Secret Paw Wax Protection
For dogs who refuse to wear boots, Musher’s Secret wax became my go-to solution. This wax-based formula has been used by mushers in the Iditarod, giving it serious cold-weather credibility. I apply it before every winter walk as a protective barrier.
My application technique makes the product work better. I warm the wax between my hands for about 30 seconds until it softens. Then I massage it thoroughly into each paw pad and between the toes where salt accumulates. The entire process takes about two minutes per dog.
The wax creates an invisible shield against salt and chemical deicers. I notice my dog no longer lifts his paws repeatedly during walks. His paw pads stay moisturized instead of cracking from the cold and dry air.
One container lasts me about three months with daily applications. I keep one by the door and one in my car for convenience. The product is safe if licked, though it rarely happens because it absorbs quickly into the skin.
Natural Dog Company PawTection Balm
I use Natural Dog Company PawTection Balm as my post-walk recovery treatment. This organic option contains healing ingredients like shea butter and vitamin E. It repairs already-irritated paws from snow safety for animals concerns.
The difference between this balm and the wax is timing. I apply Musher’s Secret before walks for protection. I use PawTection after walks for healing. Together, they form my complete paw care system.
The balm works well for dogs with existing paw pad cracks. I noticed improvements within three days of consistent use. The redness between my dog’s toes disappeared, and the rough patches smoothed out.
I keep both products in my winter kit because they serve different purposes. The balm also works great for dry nose treatment. My senior dog benefits from the extra moisture during harsh winter months.
How I Train My Dog to Wear Boots
Getting my dog comfortable with boots required patience and strategy. Most dogs walk funny at first because boots feel unnatural. I captured those hilarious high-stepping walks on video, but the training paid off.
The training process takes about four weeks for most dogs. Rushing it creates negative associations that make future attempts harder. I learned to celebrate small victories and never force the boots on during stressful moments.
The Gradual Introduction Method
I break boot training into weekly phases that build confidence slowly. Week one focuses purely on familiarity. I left the boots on the floor near my dog’s favorite spot with treats scattered around them. He sniffed them without any pressure to wear them.
Week two introduced actual contact. I put one boot on for just 30 seconds while giving high-value treats. I chose his front left paw because it’s his least sensitive. We did this three times daily with lots of praise.
During week three, I added boots gradually. We went from one to two boots, then three, then all four. I increased the duration by one minute each day. Indoor playtime while wearing boots helped him forget about them.
By week four, he wore all four boots during short indoor sessions. I timed these sessions right before dinner when he was motivated by food. Then we moved training outdoors for five-minute walks that gradually extended to our normal 20-minute route.
Using Positive Reinforcement
My treat strategy made the difference between success and frustration. I reserved high-value rewards exclusively for boot time. Small pieces of chicken or cheese only appeared when boots were involved. This created powerful positive associations.
Distraction techniques helped during the awkward adjustment phase. I put boots on right before walks when excitement was already high. The anticipation of going outside outweighed the discomfort of wearing boots.
I celebrated every successful session with enthusiastic praise. My energy level directly impacted my dog’s willingness to cooperate. When I stayed upbeat and patient, he responded much better than when I showed frustration.
Here’s my boot training success checklist that I follow:
- Start training indoors in a familiar, comfortable space
- Use treats your dog doesn’t get any other time
- Keep early sessions under two minutes to prevent overwhelm
- Let your dog set the pace without forcing progress
- Practice during positive moments, never during stress
- Film progress to track improvements you might not notice daily
- Consider using training apps like Puppr for additional reinforcement techniques
After each winter walk, I follow a consistent paw care routine. I wash and dry my dog’s feet and belly area thoroughly. I check for any cracks in paw pads or redness between toes that indicate irritation. This inspection takes less than a minute but prevents bigger problems.
I always wipe feet when coming inside, even on short trips. Ice buildup between toes can be painful and hard to spot. A quick check becomes second nature after a few weeks of winter walking.
| Protection Method | Best For | Application Time | Durability | Price Range |
|---|---|---|---|---|
| Ruffwear Grip Trex Boots | Maximum protection on harsh terrain | 2-3 minutes per session | Lasts entire walk, reusable | $80-$90 per set |
| Musher’s Secret Wax | Boot-resistant dogs, moderate conditions | 2 minutes before each walk | 2-3 hours per application | $15-$20 per container |
| PawTection Balm | Post-walk healing and prevention | 1-2 minutes after walks | Overnight absorption | $18-$25 per tin |
| Canada Pooch Soft Shield Boots | Dogs transitioning to boots | 2-3 minutes per session | Lasts entire walk, reusable | $45-$55 per set |
The combination approach works best for my situation. I use boots during long walks on heavily salted sidewalks. I apply wax for quick trips outside or when weather conditions are moderate. The balm provides nightly recovery treatment regardless of which protection method I used during the day.
Salt and ice remain brutal on sensitive paw pads throughout winter. My vigilance about paw protection has eliminated the limping and discomfort my dog experienced before I established these routines. The investment in quality products and training time pays off in my dog’s comfort and safety.
Heated Beds and Indoor Warmth Solutions That Actually Work
My dog used to wake up stiff every winter morning. I got him a heated bed, and it changed everything. He now bounces up with energy I hadn’t seen in months.
Creating warm indoor spaces is key for winter pet health. It affects your pet’s mobility, sleep, and overall wellbeing during cold months.
I’ve tested many warming solutions over five years. Some work, while others waste money and electricity. Here’s what keeps pets warm and comfy indoors.
K&H Pet Products Thermo-Bed for Senior Pets
The K&H Thermo-Bed is my top pick for pet cold protection. It has a dual-thermostat system that keeps a perfect temperature for dogs.
The bed’s orthopedic foam is a game-changer for pets with joint issues. My twelve-year-old Lab has hip dysplasia, and this bed supports his joints. It also keeps him warm, reducing morning stiffness.
The bed is safe, thanks to its chew-resistant cord and MET-listed electrical components. I can leave it on all night without worrying about fires.
It costs about 15 cents a day to run, which is less than $5 a month. The fleece cover is easy to wash, keeping the bed clean without hassle.
Aspen Pet Self-Warming Mat Technology
My cat wouldn’t use any heated bed until I found the Aspen Pet Self-Warming Mat. It’s safe for her because it doesn’t use electricity.
The mat reflects your pet’s body heat back to them. It’s a passive system that doesn’t cost any energy. This makes it safe and efficient.
I placed mats in my cat’s favorite spots. She moves between them, always finding a warm spot. This flexibility is great for pets that like to change their resting places.
The mats work best for cats and small dogs under 25 pounds. Larger dogs might need more space to stay warm. I use them as extra warmth for bigger animals.
Petmate Indigo Insulated Doghouse for Outdoor Use
Some pets, like working dogs, need to stay outside in winter. My cousin’s Great Pyrenees stays outside, so we got him the Petmate Indigo Doghouse.
The doghouse is well-insulated, keeping warm even when it’s -10°F outside. I’ve seen a 20-degree difference in temperature inside and outside.
The raised floor stops cold from coming up from the ground. I added straw for extra insulation. The roof keeps out wind, rain, and snow.
I only recommend outdoor housing for dogs bred for cold climates. Breeds like Huskies and Pyrenees can handle winter. But, pet cold protection is key, and they should come inside in extreme weather.
Where I Place Heated Beds for Maximum Comfort
Bed placement is key for warmth. I’ve tried different spots to find the best ones.
I put my dog’s bed in the bedroom corner, away from the door. This spot is warm and draft-free. It keeps him cozy.
I place beds on thick rugs to insulate from the cold floor. This stops heat loss and keeps pets warm.
Heated beds near vents can overheat pets. I keep beds at least six feet away from vents. This prevents overheating.
Windows let cold air in, even when closed. I avoid beds near windows. Interior walls are warmer and more stable.
I use a hygrometer to check temperature and humidity. This helps me find the best spots for beds. Keeping humidity between 30-50% prevents dry skin in pets.
Ideal heated bed locations include:
- Corner areas away from high-traffic doorways and cold drafts
- Interior walls to avoid losing heat to outside cold
- Quiet spaces for undisturbed rest
- Areas with consistent temperature throughout the day and night
- Elevated positions on rugs or pet furniture to prevent ground-cold transfer
I made a temperature zone chart after a whole winter. It shows the warmest and coldest spots, helping me place beds better.
| Room Location | Average Temperature | Humidity Level | Suitability for Heated Beds |
|---|---|---|---|
| Master Bedroom Corner | 68-70°F | 40-45% | Excellent – Stable and draft-free |
| Living Room Near Window | 62-65°F | 30-35% | Poor – Cold drafts and low humidity |
| Basement Family Room | 64-66°F | 45-50% | Good – Cool but consistent temperature |
| Kitchen Near Back Door | 60-63°F | 35-40% | Poor – Frequent door openings create drafts |
I check petzvibes.com for the right bed size and heating level for different breeds. They have detailed charts to help choose the right bed.
I use apps to find sales on heated beds. This saved me nearly 40% on my K&H Thermo-Bed. Investing in the right products is worth it.
Creating indoor warmth is more than just buying expensive products. It’s about placement, humidity, and understanding your pet’s needs. This makes a big difference in winter pet health.
Smart Technology and Apps I Use for Cold Weather Monitoring
When it gets cold, I use more than just coats and boots. I rely on smart technology to keep my pets safe. These devices give me real-time updates and alerts, helping me protect my pets even when I’m not home.
I was skeptical at first. But after seeing how these tools saved my pets, I’m a believer. I mix old safety habits with new tech.
Whistle GO Explore GPS Tracker with Temperature Alerts
The Whistle GO Explore saved my dog from hypothermia last January. My pet sitter took him outside in the cold, and I got a warning on my phone. It was a lifesaver.
This GPS tracker does more than track location. It shows my dog’s activity levels, helping me notice when he’s cold. This led me to add more indoor fun on cold days.
The tracker needs a subscription ($9.95 monthly). But it’s worth it for winter pets safety. On a trip last December, the GPS was incredibly accurate, even in rural areas.
More dogs are lost in winter than any other season. Snow hides familiar scents and disorients pets.
The health tracking feature monitors:
- Daily activity minutes and calories burned
- Time spent outdoors with temperature data
- Rest patterns and sleep quality
- Behavior changes that might indicate cold stress
WeatherBug App for Pet Safety Planning
I use WeatherBug for local weather forecasts. It helps me plan safe outdoor time for my pets. The app has features that are great for pet owners in winter.
I set up alerts for when it’s too cold or windy. These warnings come to my phone, helping me decide on walks.
The hourly forecast is key. I check it to find the warmest part of the day for walks. This is usually between 11 AM and 2 PM.
The “Lifestyle Forecasts” section is a surprise. It gives pet safety tips based on the weather. On very cold days, it suggests limiting outdoor time.
I also use the “Spark” lightning alerts for winter storms. They give me notice to prepare indoor activities and keep pets safe during bad weather.
Petcube Camera for Monitoring Indoor Pets
My Petcube Camera showed me my dog was sleeping in a cold spot. The night vision revealed this, something I missed during the day.
This camera gives me peace of mind when I’m away. I can see if my pets are using their heated beds and not showing cold stress signs.
The two-way audio is amazing. My cat runs to the camera when she hears my voice. I use it to call her to her heated mat on cold afternoons.
The treat-dispensing feature keeps my pets entertained indoors. On cold days, I can interact with them remotely and keep them mentally active.
Key features I use include:
- 1080p HD video with 160-degree wide-angle view
- Night vision for 24/7 monitoring
- Sound and motion alerts sent to my phone
- Video recording to track behavior patterns
Setting Up Temperature Alerts Through Amazon Alexa
I’ve made my Amazon Alexa a pet safety assistant. I ask, “Alexa, what’s the pet safety temperature?” and get a response with current weather and walk safety.
Setting this up took 15 minutes. It’s now essential. I connected a SensorPush wireless thermometer to my Alexa, getting alerts if the garage gets too cold.
The garage monitoring is important. I store outdoor pet gear there. When it gets too cold, Alexa alerts me throughout the house.
I’ve also set reminders based on weather. Before walks, Alexa reminds me to apply paw wax if it’s freezing or if sidewalks are salty.
Creating Custom Pet Safety Routines
My favorite automation turns on my pet’s heating pad at sunset. This ensures warmth before it gets too cold.
Here’s how I structured my most useful routine:
| Trigger | Action | Purpose |
|---|---|---|
| Temperature drops below 35°F | Announce alert on all Echo devices | Remind me to limit outdoor time |
| 6:00 PM daily (winter months) | Turn on smart plug for heated bed | Ensure warmth before bedtime |
| Voice command “walk time” | Provide current temp and wind chill | Help decide on appropriate gear |
| Garage temp below 40°F | Send notification to phone | Prevent equipment freezing |
I’ve connected these devices with IFTTT applets. One applet logs daily temperature and walk duration to a Google Sheet. This helps me track patterns and my dog’s energy levels.
Another applet sends me a text if indoor temperature drops too low when I’m away. This alerts me to heating system problems before my pets get uncomfortable.
GPS tracking, weather monitoring, indoor cameras, and smart home automation create a safety network. These technologies protect my pets during winter.
Most of these products work well with smart home systems. Setting them up takes time, but the benefits are worth it. I now get alerts for any situation that could harm my pets in winter.
Winter Nutrition Tools and Heated Water Solutions
One freezing January morning, I found my dog’s water dish was frozen solid. This made me realize I needed a better way to keep his water from freezing. My vet also told me my dog was burning more calories just to stay warm during walks.
This led me to rethink how I keep my dog hydrated and fed during winter. Cold weather brings special challenges that need special tools and feeding plans.

K&H Thermal-Bowl Heated Water Dish
After the frozen water incident, I bought the K&H Thermal-Bowl. It’s been working on my porch for three winters. It keeps water from freezing down to -20°F, even in Minnesota’s coldest nights.
The steel construction has withstood my dog’s enthusiastic drinking without a single crack. The 5.5-foot steel-wrapped cord also resists chewing, which is important because my dog likes to investigate with his teeth.
I was worried about the cost, so I measured the electricity usage. It costs about $1.50 a month to run. This means my dog always has access to fresh water, even when I’m working from home.
The thermostat only turns on when it gets cold, making it energy-efficient. I placed it on the covered porch near the back door, on a rubber mat to prevent it from sliding.
Farm Innovators Heated Pet Bowl for Multiple Pets
My neighbor with three dogs uses the Farm Innovators model. I’ve seen it in action during our morning walks. The 2.5-gallon capacity is great for multiple pets or when you’re away from home for long hours.
She fills it once in the morning, and it stays liquid all day. The built-in thermostat works like the K&H model, turning on only when needed. This larger bowl is perfect for cold weather when you can’t refresh water often.
Her dogs prefer drinking from this bowl over eating snow in the yard. Snow can have harmful chemicals like road salt and antifreeze.
Portable Insulated Water Bottles for Winter Walks
I learned that dogs get thirsty during winter walks, not just summer ones. During a long hike last February, I saw my dog eating snow. My vet said snow doesn’t hydrate well and can have harmful contaminants.
Now, I carry a Gulpy collapsible water bottle system in my jacket pocket. The insulated design keeps water from freezing for about two hours in temperatures around 20°F. The attached bowl makes it easy for my dog to drink without me fumbling with separate containers in bulky gloves.
I offer fresh water every 20 minutes during winter hikes, after he’s been playing in the snow. He drinks more enthusiastically from the bottle than from snow, and his energy levels stay consistent throughout our adventures.
Why I Adjust My Pets’ Calorie Intake in Winter
That conversation with my veterinarian about calorie requirements changed everything. She explained that dogs who stay active outdoors in winter burn 10-15% more calories just to keep warm. Their bodies work harder in the cold, needing more fuel.
But she stressed an important nuance—this applies mainly to pets who stay active. Indoor-only pets might actually need fewer calories in winter because they’re less active.
I increased my dog’s food by about 15% during our coldest months (December through February). This meant adding a third cup of kibble to his regular portions. I check his body condition score weekly—I should be able to feel his ribs easily without seeing them prominently.
I use the PetDesk app to track feeding amounts and body weight changes throughout the season. This helps me adjust portions if he gains or loses weight unexpectedly. Every dog is different, so I recommend consulting your veterinarian before making dietary changes.
| Activity Level | Temperature Range | Calorie Adjustment | Feeding Notes |
|---|---|---|---|
| Highly Active (2+ hours outdoor daily) | Below 20°F | Increase 15-20% | Add high-protein treats between meals |
| Moderately Active (1 hour outdoor daily) | 20-32°F | Increase 10-15% | Monitor body condition weekly |
| Light Activity (30 min outdoor daily) | 32-40°F | Increase 5-10% | May need no adjustment depending on breed |
| Indoor Only | Any outdoor temp | Maintain or reduce 5% | Watch for winter weight gain |
I focus on foods with higher fat content and protein during peak winter. Sometimes I add a small amount of canned food to his regular kibble. This provides extra calories and increases moisture intake, helping with hydration.
The dry winter air dehydrates pets faster than most people realize. I make sure my dog drinks plenty of water by keeping multiple bowls available. I refresh them with lukewarm (never hot) water several times daily. Cold water can be unappealing when your dog is already chilled from being outside.
For detailed nutrition guides and seasonal feeding calculators, I often reference resources at petzvibes.com. I’ve also adapted the MyFitnessPal app to track my dog’s caloric intake. I created a custom food diary for him, which helps me stay consistent with winter feeding adjustments.
These changes might seem small, but proper nutrition and hydration have made a big difference in my dog’s energy levels and coat condition throughout winter. He recovers faster from outdoor activities and seems more comfortable during the coldest months.
Essential Outdoor Safety Gear for Winter Adventures
Visibility became my top priority after a close call on an icy morning walk last winter. My dog and I were crossing a residential street at dawn when a car appeared seemingly out of nowhere, sliding slightly on black ice. The driver later told me she barely saw us against the snow-covered backdrop.
That moment changed how I approach snow safety for animals completely. I realized that winter walks aren’t just about keeping warm—they’re about staying visible and maintaining control in unpredictable conditions.
Winter transforms our walking environment in ways that catch many pet owners off guard. Darkness arrives by 5 PM in many parts of the country during December and January. Snowfall reduces visibility to just a few feet sometimes.
The right outdoor safety equipment makes the difference between a pleasant winter adventure and a potentially dangerous situation. I’ve assembled specific gear that addresses the unique challenges of cold weather outings.
Noxgear LightHound LED Vest for Dark Mornings
The Noxgear LightHound changed my early morning routine completely. This illuminated vest features 360-degree visibility thanks to LED fiber optics woven throughout the entire garment.
Unlike clip-on lights that create just a single point of glow, this vest makes my dog visible from every angle. I charge the rechargeable battery after every three or four walks, and it lasts about five hours on high visibility mode.
The adjustable straps fit over winter coats without any issues. I love how the vest stays in place even when my dog rolls in snow or shakes off.
One snowy Tuesday morning, a driver stopped to tell me she spotted my dog from two blocks away. That comment reinforced why I invested in this pet cold weather gear. The vest prevented what could have been a scary moment at a busy intersection.
The difference between this and cheaper alternatives became obvious immediately. Standard reflective materials only work when light hits them directly. The LightHound actively emits light, making my dog visible even in complete darkness without car headlights nearby.
Coastal Pet Reflective Control Leash
I switched to a winter-specific leash after struggling with my retractable summer leash on icy sidewalks. The Coastal Pet Reflective Control Leash gives me significantly better control with its six-foot fixed length.
The reflective stitching runs along the entire length of the leash, not just in small sections. This creates a visible line between me and my dog during dark morning walks.
The padded handle makes a huge difference when I’m wearing thick winter gloves. I can maintain a firm grip without the leash cutting into my hands. The sturdy clasp hasn’t failed once, even when my dog suddenly lunges toward an interesting snowdrift.
I keep this leash in my winter coat pocket throughout the season. Having a dedicated winter leash means I’m never scrambling to find the right equipment before heading out in cold weather.
Kurgo Loft Insulated Reversible Dog Coat with Built-in Harness
The combination design of this coat simplified my winter routine tremendously. Instead of wrestling my impatient dog into both a harness and a separate coat, I now have one piece of equipment that does both jobs.
The synthetic down insulation provides excellent warmth without adding bulk. My dog moves freely without the restricted motion that some puffy coats cause. The reversible design offers versatility—one side is bright orange for maximum visibility, while the other is a more subdued gray.
The harness portion includes reflective trim that catches light from multiple angles. More importantly, the integrated design prevents the coat from shifting or riding up during walks. The coat stays securely in place because it’s anchored at the harness attachment points.
I’ve used the harness integration to quickly grab my dog when he started slipping on an icy patch. That secure connection point gave me the control I needed to steady him before he lost his footing completely.
My Winter Walking Safety Checklist
Over several winters, I’ve developed a system for safe cold weather outings. This checklist lives on my phone, and I reference it before every walk to ensure I haven’t forgotten anything critical.
Here’s my complete pre-walk routine:
- Weather check: I use the WeatherBug app to verify current temperature and wind chill (below 20°F means an abbreviated walk)
- Gear inspection: Check all boot closures, coat attachments, and leash integrity for wear or damage
- Paw protection: Apply paw wax to all four paws, working it between the pads
- Visibility confirmation: Verify LED vest is charged and functioning, reflective gear is clean
- ID tag verification: Ensure phone number is current and tag is securely attached (dogs get lost more during winter than any other season)
- Phone preparation: Confirm phone is charged with emergency contacts easily accessible
- Route selection: Choose pre-planned path avoiding heavily salted main roads when possible
- Time limits: Set phone timer based on temperature (I follow a sliding scale from 5 to 30 minutes)
- Post-walk supplies: Have paw cleaning towels and warm water ready at the door
I mapped out three different walk lengths around my neighborhood—a quick five-minute loop for bathroom breaks, a fifteen-minute route for moderate cold days, and a thirty-minute path for milder winter weather. This planning lets me adjust in real-time based on conditions without wandering aimlessly.
Using apps like AllTrails, I saved these routes and shared them with family members. Someone always knows where I’m walking, which provides an extra layer of security during winter months.
I check weather forecasts twice daily during winter. The first check happens each morning to plan the day’s walks. The second check occurs immediately before heading outside, as winter conditions change rapidly. What looked fine at 8 AM might be dangerously cold by noon.
Never let dogs off leash on snow or ice, as they can lose their scent trail and become disoriented quickly. I learned this from a local rescue organization that sees a spike in lost dogs every January and February.
I schedule longer walks during the warmest parts of the day, typically between 11 AM and 3 PM. Morning and evening bathroom breaks stay quick and purposeful. This timing strategy keeps outdoor exposure manageable while meeting my dog’s exercise needs.
You can download a printable version of this checklist at petzvibes.com, where I’ve created a customizable template. I also set up deal alerts through apps like Slickdeals to catch safety gear sales throughout the season.
The investment in proper outdoor safety equipment pays off every single walk. My dog stays visible, warm, and secure even in challenging winter conditions. More importantly, I have peace of mind knowing we’re prepared for whatever weather comes our way.
Cold Weather Grooming Products I Keep Stocked
When my dog got terrible dry skin in his first winter, I had to change how I groomed him. He scratched a lot, leaving flakes everywhere. A vet visit showed me that cold weather pet care needs different products and methods than summer.
Going outside in the cold and then coming back to a warm home was bad for his skin. I learned that bathing too much can strip away oils that keep his skin moist. This winter changed how I groom my dog for winter pet health.
Managing Undercoats with Proper Tools
The FURminator deShedding Tool became essential once it got cold. I use it more in winter, even though I bathe him less. Weekly sessions with the tool remove loose undercoat that can mat when it gets wet from snow.
This helps his coat keep him warm by letting air circulate better. I work in sections, using the tool gently in the direction of hair growth. I do this before walks so loose fur doesn’t get wet and clumpy outside.
The FURminator comes in different sizes for different coats. I chose the large size for my Golden Retriever’s thick coat.
Deep Moisturizing for Dry Winter Skin
Warren London Deep Hydration Dog Butter changed how I treat dry skin patches. This thick moisturizer works wonders on my dog’s elbows where he licks constantly in winter. It has shea butter, oatmeal, and aloe to soothe irritated skin.
I warm the butter in my hands before applying it to affected areas. I use it twice a week or whenever I see dry patches. Within two weeks, my dog’s skin became healthy and supple again.
Natural Protection for Paws and Noses
Burt’s Bees Paw and Nose Lotion is now a must-have in my grooming kit. I chose it for its natural ingredients without petroleum or synthetic fragrances. My dog licks his paws a lot, so I wanted safe ingredients.
I apply this lotion to his paw pads and nose every night. Without it, his nose gets dry and cracked from the winter wind. The formula absorbs quickly without leaving a greasy mess on my floors.
Adapting Your Routine for Winter Conditions
I now bathe my dog every 6-8 weeks instead of every 3 weeks in summer. I use Earthbath Hypoallergenic Grooming Wipes for spot-cleaning. This protects his natural oils for winter pet health.
I trim the hair between his paw pads every two weeks to prevent ice balls. I use small scissors while he’s relaxed after dinner. This makes our winter walks more comfortable for him.
I also trim sanitary areas and shorten leg feathering to prevent snow from sticking. But I never shave him down to the skin. His long coat keeps him warm.
Brushing him right after coming inside is now part of my routine. I remove any salt or chemicals from his coat before they can be licked off. This prevents stomach upset from de-icing chemicals.
I run a humidifier in my bedroom to keep the humidity at 40%. This keeps his skin and mine from getting dry in the harsh winter. I use apps to monitor the humidity constantly.
When I need to use moisturizing shampoo, I only use what my vet recommends. These formulas are designed for cold weather pet care without stripping his skin of oils. I make sure to dry him thoroughly after bathing.
For those who prefer professional help, Rover and Wag apps are great for finding groomers who know about winter coats. Professional grooming every 8-10 weeks helps keep up with my home routine.
I found helpful videos at petzvibes.com for safe paw hair trimming. Their guides taught me how to brush his coat properly for different types. These resources helped me avoid common grooming mistakes.
| Grooming Task | Summer Frequency | Winter Frequency | Key Difference |
|---|---|---|---|
| Full Bathing | Every 3 weeks | Every 6-8 weeks | Preserves natural oils |
| Brushing Sessions | 2-3 times weekly | Daily after outdoor time | Removes salt and chemicals |
| Paw Pad Trimming | Monthly | Every 2 weeks | Prevents ice ball formation |
| Moisturizer Application | As needed | Twice weekly minimum | Combats dry indoor heat |
| DeShedding Tool Use | Weekly | Weekly before walks | Prevents wet undercoat matting |
The most important thing I learned is that winter pet health needs proactive grooming, not just treating problems after they happen. Keeping my home humid and drying him off right after being outside prevents most skin issues. These steps are better than treating irritation after it starts.
Never shave your dog down to the skin in winter. Longer coats keep them warm, while short-haired cuts can’t. If your dog has long hair, focus on strategic trimming, not cutting it all off.
My winter grooming philosophy is about protection, not perfection. I focus on keeping his skin healthy, his coat functional, and him comfortable. This keeps him happy and healthy all winter while protecting him from harsh weather.
My Winter Pet Safety Emergency Kit Essentials
Being stranded in my car during a snowstorm with my cold dog was a wake-up call. It taught me the importance of being prepared for emergencies. Now, I have emergency kits in different places to ensure my pet stays safe.
Winter weather can be unpredictable. You might get stuck on the highway or lose power during a blizzard. These situations happen to many pet owners every winter.
I built my emergency kit based on my own experiences and what I wish I had during emergencies. Each item has a specific purpose that I’ve used or wish I had used.
Coleman Emergency Thermal Blankets
I have a 4-pack of Coleman emergency thermal blankets in my car and at home. These blankets are cheap but can save your pet’s life in emergencies.
During a winter hike, my dog fell through ice into a creek. I pulled him out, dried him, and wrapped him in a thermal blanket. His shaking stopped within minutes.
These blankets reflect 90% of body heat back to your pet. They’re small and easy to store. I keep them in my car, backpack, and emergency drawer at home.
The blankets are lightweight but provide warmth that regular blankets can’t. They’re essential for any emergency situation.
Pet First Aid Kit by RC Pet Products
My RC Pet Products first aid kit has everything I need for medical emergencies. It includes bandages, gauze, antiseptic wipes, a thermometer, tweezers, and an emergency guide for pets.
I added vet wrap, an extra leash and collar, and laminated cards with my vet’s number and my pet’s medical info. These additions are perfect for winter emergencies.
The laminated medical cards were invaluable when my dog needed emergency care. They saved time during a stressful situation.
I replace used items right away. Every September, I check expiration dates on medications and ointments. This keeps my kit effective and up-to-date.
HotHands Hand Warmers for Emergency Situations
HotHands warmers are a key part of my emergency kit. During a power outage, they helped when my dog showed signs of hypothermia. I wrapped them in cloth and placed them on his abdomen.
I keep a 10-pack in my car and at home. They activate quickly and keep heat for over 10 hours. This makes them perfect for long emergencies.
It’s important to use these warmers safely. Never apply them directly to your pet’s skin. Always wrap them in a towel or cloth first. Watch your pet closely while using them, and seek vet care as soon as possible.
I learned about warming techniques from my vet. Warming too quickly can harm your pet. The slow warmth from wrapped hand warmers is safer.
What I Keep in My Car for Winter Pet Emergencies
My car emergency kit is in a labeled bin in the trunk. It’s easy to grab in emergencies. This saves time.
I check my kit every October. I take photos and set reminders to rotate supplies. This ensures everything is fresh and ready.
Temperature Emergency Supplies
My temperature emergency supplies protect my pet from cold. They address winter hazards for pets that can happen quickly:
- Thermal blankets: Multiple Coleman emergency blankets for immediate warmth
- HotHands warmers: 10-pack for extended emergency heating needs
- Zero-degree sleeping bag: A thick bag rated to 0°F that can envelop my dog completely
- Sealed towels: Dry towels in waterproof bags because staying dry is critical
- Battery-powered heater: Small portable unit running on D batteries for enclosed spaces
- Extra dog coats: Backup winter coats and blankets for the car
- Emergency fire supplies: Waterproof matches and emergency candles for worst-case scenarios
- Car emergency tool: Device with window breaker and seatbelt cutter
The battery-powered heater was a game-changer during a snowstorm. It kept my dog warm without draining my car battery. I replace the batteries twice a year to keep it reliable.
Winter Travel Essentials
Beyond temperature supplies, I carry travel essentials for emergencies. These items prepare me for situations where we might be stranded or need to evacuate:
- Food supply: Three days of dog food in sealed containers
- Water system: Collapsible bowls and bottled water (replaced seasonally for freshness)
- Medications: Full supply with copies of prescriptions
- Identification gear: Leash, spare collar with updated ID tags
- Waste management: Abundant supply of poop bags
- Lighting: Flashlight with extra batteries for nighttime emergencies
- Power backup: Traditional and solar-powered phone chargers
- Emergency contacts: Printed copies of emergency vet locations along common routes
- Insulation pad: Foam mat to protect my dog from cold car floor or ground
- Visibility vest: High-visibility gear for roadside safety
- Emergency whistle: For attracting attention if needed
I researched and mapped emergency vet clinics along my routes. Having these addresses printed helps in emergencies. I also downloaded offline maps for areas I visit often.
The Red Cross Pet First Aid app guides me in emergencies. I downloaded it and learned the protocols before needing them. Having this knowledge offline gives me confidence in emergencies.
My GasBuddy app helps find services during winter travel, while Waze updates road conditions. These tools help me avoid dangerous driving with my pet. I check them before every winter trip.
I have a printable emergency kit checklist that I review quarterly. This approach to winter hazards for pets means I’m always prepared. The peace of mind it gives me is worth the effort.
My focus on emergency preparedness might seem extreme to some. But after that snowstorm, I’ll never risk my pet’s safety again. These supplies have given me confidence in winter weather.
Dangerous Winter Hazards I Watch Out For
Every winter, I become very careful about dangers that could harm my pets. I’ve learned to spot warning signs early. Many dangers are invisible until it’s too late.
My dog can’t tell me when his paws burn from sidewalk chemicals. He can’t warn me about sweet-tasting dangers in the garage.
I’ve spent years learning from vets and my own experiences. This has saved my pets from emergencies. Now, I want to share what I watch for every day during cold weather.
Identifying Pet-Safe Ice Melt Products
My journey to find safe ice melt products started with a painful lesson. My dog got chemical burns on his paw pads from a neighbor’s salted sidewalk. Seeing him in pain broke my heart.
That incident made me research what we spread on walkways. Most ice melts have harsh chemicals that harm pets. Sodium chloride and calcium chloride burn sensitive paw pads.
When pets walk on these surfaces, the chemicals stick to their paws. Later, when they lick their paws clean, they ingest these toxic substances. This can lead to stomach upset, vomiting, and even more serious internal damage.
I started reading every label and researching alternatives. The switch to pet-safe products has given me peace of mind during every winter walk. Now I can let my dog explore without constantly worrying about what’s on the ground.
Safe Paw Ice Melter vs Traditional Rock Salt
After my dog’s paw pad injury, I looked for the safest ice melt option. I tested several products, and Safe Paw became my go-to choice. The difference between this product and traditional rock salt is night and day.
Traditional rock salt creates a burning sensation on contact with skin. I once touched some with my bare hand and immediately understood why my dog had been in such distress. The crystalline structure is sharp and abrasive, literally scratching paw pads as pets walk across it.
Safe Paw uses a completely different technology. It’s a crystalline amide core with a special glycol admixture that melts ice down to -2°F without caustic effects. The texture looks like small rounded pellets, which makes a huge difference for tender paws.
| Feature | Traditional Rock Salt | Safe Paw Ice Melter | Cost Comparison |
|---|---|---|---|
| Paw Pad Safety | Causes chemical burns and irritation | Non-irritating, safe for direct contact | Safe Paw costs 3x more upfront |
| Toxicity if Ingested | Causes vomiting, diarrhea, and organ damage | Non-toxic even if licked from paws | Vet bills for salt poisoning: $300-$2,000 |
| Effectiveness Temperature | Works to 5°F for most formulas | Melts ice effectively to -2°F | Similar performance in most conditions |
| Surface Damage | Corrodes concrete and kills vegetation | Safe for concrete, wood, vegetation | Property repair costs avoided |
| Application Method | Broadcast heavily for coverage | Use less product for same results | Safe Paw lasts longer per pound |
Yes, Safe Paw costs more initially—about three times the price of traditional rock salt. But when I factor in the vet bills for treating chemical burns or salt poisoning, the investment makes complete financial sense. One emergency vet visit would cost far more than several seasons of pet-safe ice melt.
I’ve taken my commitment a step further by gifting Safe Paw to my elderly neighbors. I attach a friendly note explaining it’s pet-friendly and safer for grandchildren too. This proactive approach protects my dog even when he wanders onto their property during walks.
Recognizing Early Signs of Hypothermia in Pets
Hypothermia is one of the most serious winter hazards for pets, and recognizing the early warning signs has become second nature to me. I experienced a frightening incident two years ago that taught me exactly what to watch for during cold weather outings.
We were on what I thought would be a quick morning walk when temperatures unexpectedly dropped. My dog started showing subtle changes in behavior that I initially dismissed. Within fifteen minutes, those subtle signs became impossible to ignore.
The progression of hypothermia happens in stages, and knowing these stages can save your pet’s life:
- Mild hypothermia: Shivering, cold ears and paws, slight lethargy, and actively seeking warmth
- Moderate hypothermia: Violent shivering or cessation of shivering, muscle stiffness, dilated pupils, decreased heart rate, and obvious disorientation
- Severe hypothermia: Difficulty breathing, stupor or unconsciousness, fixed and dilated pupils, and extremely weak pulse
During that scary morning walk, my dog displayed clear early warning signs. He started shivering intensely and repeatedly lifting his paws off the frozen ground. His ears felt ice-cold to my touch, and he kept trying to turn back toward home.
I immediately cut our walk short and we briskly walked home. The movement helped maintain his circulation without overexerting him. Once inside, I wrapped him in a warm—not hot—blanket I keep for emergencies.
I offered lukewarm water, which he drank eagerly. Then I called my vet for guidance, describing his symptoms and the timeline. She praised my quick response and gave me specific instructions for monitoring him over the next few hours.
Gradual warming is absolutely critical when treating hypothermia. Never use hot water, heating pads directly on skin, or heat lamps, as these can cause burns or shock the system.
If your pet shows signs of moderate to severe hypothermia, these are true emergencies requiring immediate veterinary care:
- Bring your pet into a warm environment immediately
- Wrap them in warm blankets, replacing with fresh warm blankets every 10 minutes
- Place wrapped hot water bottles (not heating pads) against their abdomen, wrapped in towels
- Check their temperature rectally if possible (normal dog temp is 101-102.5°F)
- Transport to emergency vet while continuing warming measures
- Never attempt to warm pets too quickly or with direct heat sources
I now carry an emergency thermometer on winter walks. Monitoring body temperature gives me objective data. This simple tool has become invaluable for my winter safety protocols.
Antifreeze Dangers and Prevention Strategies
Pet antifreeze danger represents one of my absolute biggest fears during winter months. Ethylene glycol-based antifreeze is extremely toxic, has a deceptively sweet taste that attracts animals, and can kill in terrifyingly small amounts. The statistics I learned from my vet are haunting.
As little as one teaspoon can kill a cat. One tablespoon can kill a dog. These tiny amounts mean that even a small puddle in a driveway or garage floor can be lethal if your pet takes a few licks.
The symptoms of antifreeze poisoning appear in distinct stages, which makes early detection both possible and critical:
Initial period (30 minutes to 12 hours after ingestion): Your pet may appear drunk—disoriented, wobbly, nauseous, vomiting, drinking excessively, and urinating frequently. Some pets also experience seizures during this stage.
Second stage (12-24 hours after ingestion): This is the most dangerous deception. Your pet may appear to improve and seem almost normal. But internally, the poison is causing severe damage to their kidneys that continues progressing silently.
Third stage (12-72 hours after ingestion): Severe symptoms emerge including complete kidney failure, extreme lethargy, seizures, coma, and death without aggressive veterinary intervention.
The narrow window for effective treatment is what terrifies me most. Treatment must begin within hours of ingestion for any chance of success. Once kidney damage progresses to the third stage, the prognosis becomes very poor even with intensive care.
If you even suspect your pet has ingested antifreeze, contact your veterinarian or ASPCA Poison Control at (888) 426-4435 immediately. Do not wait for symptoms to appear. Every minute counts, and early intervention can mean the difference between life and death.
I keep this number programmed into my phone as a speed dial. I’ve also saved it in my car’s navigation system and written it on a card in my wallet. When panic sets in during an emergency, having instant access to this number is critical.
Switching to Propylene Glycol-Based Products
After researching pet antifreeze danger extensively, I made a complete household conversion to safer alternatives. I replaced every single container of ethylene glycol antifreeze with propylene glycol-based products like Sierra antifreeze. This switch significantly reduced the toxicity risk in my home.
Propylene glycol-based antifreeze is substantially less toxic than ethylene glycol. While it’s not completely safe if ingested in large quantities, the lethal dose is much higher. This gives me a wider margin of safety and more time to respond if an accidental exposure occurs.
I didn’t stop with just my own vehicles. I checked every vehicle that parks in my driveway—my partner’s car, visiting family members’ vehicles, and even my lawn equipment. Anywhere antifreeze might be present became part of my safety audit.
My disposal protocol is equally strict. I never pour antifreeze down drains or into the ground. Instead, I collect old antifreeze in sealed containers and take it to my local hazardous waste facility. Many auto parts stores also accept used antifreeze for proper recycling.
Spill management is another area where I’ve become obsessive. If I see even a few drops of antifreeze on my driveway, I immediately spring into action. I use absorbent material like cat litter or commercial absorbent to soak up the liquid, then dispose of it in a sealed bag with my hazardous waste.
After absorbing the spill, I thoroughly rinse the area with water. I don’t consider the job done until I’ve scrubbed the spot with soap and rinsed multiple times. Then I keep my pets away from that area for the rest of the day, just to be absolutely certain.
I’ve marked my calendar with reminders to check all vehicles for antifreeze leaks before winter arrives. This seasonal inspection has become as routine as changing smoke detector batteries. During this check, I look under vehicles for telltale green, yellow, or pink puddles that indicate leaks.
My garage has become a pet-free zone during any vehicle maintenance. I install a baby gate across the garage entrance whenever I’m working on cars. This physical barrier prevents curious noses from investigating interesting smells while I’m distracted by repairs.
How I Check for Frostbite on Ears, Paws, and Tails
Cat frostbite prevention and checking for frostbite in all pets has become part of my post-walk routine every single winter day. Frostbite occurs when tissue freezes, and certain body parts are more vulnerable due to reduced blood flow and less protective fur.
The most at-risk areas are ear tips, tail tips, paw pads, and areas with little fur coverage like the scrotum in male dogs or mammary glands. These extremities get cold first because blood flow naturally decreases to these areas to protect core body temperature.
My examination routine starts the moment we come inside from cold weather. I check my dog while he’s standing, before he curls up on his heated bed. This timing is important because frostbitten tissue often doesn’t show obvious damage until it begins rewarming.
Here’s exactly what I look for during each body part examination:
Ear tips: I gently feel the edges of both ears between my fingers. Healthy tissue should feel pliable and warm up quickly in my hands. Frostbitten tissue feels cold, stiff, or brittle. I look for color changes—pale gray, bluish, or white skin instead of the normal pink color.
Paw pads: I check each paw individually, feeling the pads and between the toes. Frostbitten pads may appear discolored or feel unusually firm. My dog sometimes pulls his paw away if a pad has been damaged, showing sensitivity to touch.
Tail tip: I run my hand along the entire length of his tail, paying special attention to the last few inches. A cold, stiff tail tip that doesn’t warm quickly in my hands raises concern. Color changes here can be subtle, so I always compare to the base of the tail.
Signs of frostbite I’ve learned to recognize include:
- Skin that appears pale, gray, bluish, or white instead of normal pink
- Tissue that feels cold to touch and doesn’t warm quickly
- Areas that feel brittle, stiff, or waxy instead of flexible
- Pain or sensitivity when touched—my dog may whine or pull away
- Swelling or blistering that develops hours after exposure
- Blackened or dead skin that appears during the rewarming process (severe cases)
If I discover possible frostbite, my response is immediate and specific. First, I bring my pet into our warmest room and keep him calm. Stress and movement can worsen tissue damage, so creating a peaceful environment is my priority.
I prepare warm water compresses using water heated to approximately 104-108°F. I test the temperature on my inner wrist first, just like testing baby formula. The water should feel warm but not hot to my skin.
I soak clean towels in this warm water, wring them out slightly, and gently apply them to the affected areas. I never rub or massage the tissue, as this can cause additional damage to frozen cells. Instead, I simply hold the warm compress against the area for several minutes.
I replace the compresses every few minutes as they cool down, continuing this process for 15-20 minutes. After warming, I gently pat the areas dry with a soft towel. Then I immediately call my veterinarian, even if the tissue appears to be recovering.
Frostbite often accompanies hypothermia, and both conditions require immediate veterinary attention. Even mild frostbite can lead to complications like infection or tissue death that develop days later.
I learned about cat frostbite prevention through my neighbor’s close call with her outdoor cat. Cats are vulnerable because they often seek shelter in dangerous places like wheel wells or under car hoods. Their ear tips and paw pads can freeze quickly during prolonged exposure.
For detailed visual guides on identifying frostbite severity and additional veterinary advice, I regularly reference resources at petzvibes.com. Having photographic comparisons helps me distinguish between normal cold exposure and actual frostbite damage.
I’ve also downloaded the Pet Poison Helpline app on my phone. This tool gives me quick access to toxin information, emergency protocols, and direct contact options when seconds matter. The app includes a symptom checker that helps me assess whether I’m dealing with an emergency or can monitor at home.
My phone now has three critical numbers on speed dial: my regular veterinarian, the nearest 24-hour emergency vet clinic, and ASPCA Poison Control. I’ve practiced accessing each number quickly, because I know that panic during an emergency can make even simple tasks difficult.
I keep written emergency protocols in my home pet safety kit. These laminated cards outline step-by-step responses for frostbite, hypothermia, and poisoning scenarios. Having these instructions readily available helped me stay calm and act effectively when my neighbor’s cat got into antifreeze last winter.
We suspected ingestion immediately when the cat came home acting disoriented and unusually thirsty. My written protocol reminded me to bring the antifreeze container to the vet, note the time of suspected ingestion, and not wait for symptoms to worsen. We got to the emergency vet within 90 minutes, and that rapid response potentially saved the cat’s life.
That experience reinforced my belief that preparation prevents panic. I review my emergency protocols at the start of each winter, updating phone numbers and refreshing my knowledge. This annual review keeps the information fresh in my mind and ensures I’m ready if something goes wrong.
Winter safety vigilance has become my default mode from November through March. While it might seem excessive to some people, I’ve seen too many close calls to become complacent. These hazards are real, they’re common, and they can be devastating if we don’t watch for them constantly.
Conclusion: Keeping Your Furry Friends Safe All Winter Long
My journey with winter pets safety has come a long way. Now, I watch my dog play in the snow, feeling confident in my ability to spot any issues early.
Cold weather pet care is manageable. Begin with basics like quality outerwear and paw protection. Learn your pet’s temperature limits. Add heated beds, emergency kits, and monitoring tech as needed.
Every pet is different. My short-haired rescue needs special care compared to my neighbor’s Husky. Watch how your pet reacts to cold and adjust your care plan.
Key things to remember: invest in proper gear, protect paws from ice and salt, and create warm indoor spaces. Monitor weather, keep grooming routines, prepare emergency supplies, and watch for hazards like antifreeze and frostbite signs.
Visit petzvibes.com for printable checklists, seasonal product updates, and a community forum. Sign up for the newsletter to get temperature alerts and care reminders.
Winter can be magical for our pets. With the right preparation, they’ll not just survive but thrive. Your furry friend counts on you to make thoughtful choices that keep them warm, safe, and happy until spring.
FAQ
At what temperature should I start worrying about my dog being too cold outside?
Dogs start feeling cold around 45°F, says my vet. Small breeds, seniors, and those with short coats are most affected. My short-haired rescue stays inside when it’s below 32°F.
Below 20°F, we only go for short potty breaks. I make sure he wears his Hurtta Extreme Warmer coat and Ruffwear Grip Trex boots. But, cold tolerance varies by breed.
I watch for signs like lifting paws and shivering. The WeatherBug app helps me check the temperature and wind chill. I also set alerts on Amazon Alexa for dangerous conditions.
How do I know if my pet’s winter coat fits properly?
I learned to measure carefully before buying a coat. It should fit from neck to tail base without restricting movement. The coat should stay in place without constant adjustment.
For harness wearers, the coat should accommodate the harness. I test the coat indoors to ensure it doesn’t restrict movement. Proper fit is key for warmth and safety.
Can I use human winter products like Vaseline to protect my dog’s paws?
I tried human products but learned they’re not safe for pets. They can cause digestive issues if licked. Musher’s Secret paw wax is a better option.
It creates a barrier against salt and ice. I apply it before walks. For already-irritated paws, I use Natural Dog Company PawTection Balm or Burt’s Bees Paw and Nose Lotion.
How long does it take to train a dog to wear boots comfortably?
Training took about three weeks. I started with one boot and gradually added more. Positive reinforcement was key.
I used the Puppr app for training. Patience and consistency are more important than speed. Rushing can create negative associations.
Do heated pet beds really use a lot of electricity?
I measured my K&H Thermo-Bed’s usage with a Kill A Watt meter. It uses only 40 watts and cycles on and off. It costs about -4 a month to run.
It only activates when my dog is on it and it’s cold. I use a Kasa smart plug to track usage. These beds are safe and prevent overheating.
What’s the safest ice melt product I can use around my pets?
I switched to Safe Paw Ice Melter after my dog got chemical burns. Traditional ice melts are caustic and toxic. Safe Paw melts ice without burning.
It’s more expensive, but it’s safer. I also provide containers with information to my neighbors. Sand or kitty litter is the safest option without melting chemicals.
How do I know if my pet is experiencing hypothermia versus just being uncomfortable in the cold?
I learned to distinguish between discomfort and hypothermia. Discomfort shows as reluctance to walk and mild shivering. Hypothermia is more serious.
For hypothermia, I bring my pet inside and wrap him in warm blankets. I offer room-temperature water and monitor closely. Never use direct heat sources.
Should I trim my dog’s coat shorter for winter to make it easier to dry after walks?
I was tempted to shorten my dog’s coat, but my vet advised against it. A dog’s coat provides insulation. Instead, I focus on strategic trimming and grooming.
I trim hair between paw pads and lightly trim sanitary areas. I use the FURminator deShedding Tool weekly. For drying, I use multiple towels and a high-velocity pet dryer on cool settings.
Can cats get frostbite, and how do I protect outdoor cats during winter?
Cats can get frostbite, and they’re more vulnerable than people think. I keep my cat indoors, but some cats need to be outside. For outdoor cats, I provide insulated shelters and heated water bowls.
I check their paws for frostbite signs. Keeping cats indoors is the safest option. They can get frostbite, hypothermia, and antifreeze poisoning outside.
What should I do if I see a pet left outside in dangerous cold weather?
Seeing a pet outside in the cold is heartbreaking. I assess the danger and call 911 or animal control if it’s life-threatening. I document the situation with photos and video.
If it’s not critical, I try to speak with the owner. I offer help like extra dog coats or heated water bowls. I report to animal welfare organizations if the owner is unresponsive.
Are there any dog breeds that genuinely don’t need winter protection?
While some breeds are more cold-tolerant, nearly all dogs need some protection in extreme cold. Breeds like Siberian Huskies thrive in cold weather. But even cold-weather breeds can get frostbite and hypothermia.
I watch for cold-stress signs in all dogs, regardless of breed. Proper protection is key, including paw protection and body insulation. I also provide heated water solutions to prevent dehydration.
How do I prevent my dog from eating snow during winter walks?
Snow eating can be harmful. I offer fresh water every 15-20 minutes and train a “leave it” command. I avoid areas with chemical contamination.
I keep walks engaging with training exercises and play. For persistent snow-eating, I consult a vet. Prevention is easier than stopping the behavior.
What’s the most important piece of winter safety gear if I can only afford one thing?
If I had to choose one thing, it would be paw protection. Boots or Musher’s Secret paw wax prevent injuries. Injuries can be painful and even dangerous.
Properly protected paws allow dogs to walk safely. Musher’s Secret wax is affordable and effective. Boots are a more expensive option but provide better protection.